Sam Madden, Joe Hellerstein, and Wei Hong
{madden,jmh}@cs.berkeley.edu, whong@intel-research.net
This document refers to the TinyDB 1.1 release, which accompanied TinyOS 1.1 and was officially released September, 2003 and represents major changes to the functionality and stability of TinyDB, particularly over the 1.0 release.
For users already familiar with TinyDB, new features in this release include:
TinyDB is a query processing system for extracting information from a network of TinyOS sensors. Unlike existing solutions for data processing in TinyOS, TinyDB does not require you to write embedded C code for sensors. Instead, TinyDB provides a simple, SQL-like interface to specify the data you want to extract, along with additional parameters, like the rate at which data should be refreshed - much as you would pose queries against a traditional database. Given a query specifying your data interests, TinyDB collects that data from motes in the environment, filters it, aggregates it together, and routes it out to a PC. TinyDB does this via power-efficient in-network processing algorithms.
To use TinyDB, you install its TinyOS components onto each mote in your sensor network. TinyDB provides a simple Java API for writing PC applications that query and extract data from the network; it also comes with a simple graphical query-builder and result display that uses the API.
The primary goal of TinyDB is to make your life as a programmer significantly easier, and allow data-driven applications to be developed and deployed much more quickly than what is currently possible. TinyDB frees you from the burden of writing low-level code for sensor devices, including the (very tricky) sensor network interfaces. Some of the features of TinyDB include:
This document serves a number of purposes. The first sections are targeted at the sensor application programmer, and include a basic overview of the TinyDB system architecture, and a QuickStart guide to using the TinyDB system, its query language and APIs. The remaining sections are targeted at readers who want to extend the TinyDB system itself.
This section provides a high level overview of the architecture of the TinyDB software. It is designed to be accessible to users of the TinyDB system who are not interested in the technical details of the system's implementation. A detailed description of the TinyDB software design is reserved for Sections 7 and 8.
We begin with a short description of a typical use-case for TinyDB. Imagine that Mary
wishes to locate an unused conference room in her sensor-equipped building, and
that an application to perform this task has not already been built.
The motes in Mary's
building have a sensor board with light sensors and microphones and have been programmed with
a room number. Mary decides that her application
should declare a room in-use when the average light reading of all the sensors in a room
are above ![]() and when the average volume is above
and when the average volume is above ![]() . Mary wants her application to
refresh this occupancy information every 5 minutes. Without TinyDB, Mary
would have to write several hundred lines of custom embedded C
code to collect information
from all the motes in a room, coordinate the communication of readings
across sensors,
aggregate these readings together to compute the average light
and volume, and then forward that information from within the sensor network to the PC where
the application is running. She would then have to download her compiled
program to each of the motes in the room. Instead, if the motes in Mary's building are running TinyDB,
she can simply pose the following SQL
query to identify the rooms that are currently in-use:
. Mary wants her application to
refresh this occupancy information every 5 minutes. Without TinyDB, Mary
would have to write several hundred lines of custom embedded C
code to collect information
from all the motes in a room, coordinate the communication of readings
across sensors,
aggregate these readings together to compute the average light
and volume, and then forward that information from within the sensor network to the PC where
the application is running. She would then have to download her compiled
program to each of the motes in the room. Instead, if the motes in Mary's building are running TinyDB,
she can simply pose the following SQL
query to identify the rooms that are currently in-use:
SELECT roomno, AVG(light), AVG(volume)
FROM sensors
GROUP BY roomno
HAVING AVG(light) > ![]() AND AVG(volume) >
AND AVG(volume) > ![]()
EPOCH DURATION 5min
TinyDB translates this query into an efficient execution plan which delivers the set of occupied rooms every 5 minutes. Mary simply inputs this query into a GUI - she writes no C code and is freed from concerns about how to install her code, how to propagate results across multiple network hops to the root of the network, how to power down sensors during the time when they are not collecting and reporting data, and many other difficulties associated with sensor-network programming.
We discuss the inner workings of TinyDB on such queries in Sections 7 and 8 below. In the remainder of this section, we present a high-level overview of the components of TinyDB. The system can be broadly classified into two subsystems:
In this section, you will learn how to install TinyDB software, set up a network of TinyDB motes, inject a query into the network, and collect the results of the query.
http://webs.cs.berkeley.edu/tos
Click on the link for your platform (PC Linux or Windows), and follow the installation instructions.
The most recent version of TinyDB is always available from the TinyOS SourceForge repository; see the TinyOS CVS Page for instructions on using CVS. In addition to the standard TinyOS distribution, TinyDB includes a number of additional files detailed in Appendix A of this document. The following table summarizes the software requirements of TinyDB:
To verify that your installation is working properly, do the following:
You'll need to make sure you have the following jar files in your classpath (they should all be available in tinyos-1.x/tools/java/jars):
You must also have the tinyos-1.x/tools/java directory in your classpath.
If you wish to take advantage of TinyDB's compatibility with the PostgreSQL database system, you'll need to install and configure Postgres (see Section 10) and include the pgjdbc2.jar file in your classpath.
Your CLASSPATH should now look something like this:
.:/path/to/java/jre/lib/rt.jar:/path/to/java/lib/dt.jar:
/path/to/java/lib/tools.jar:/opt/IBMJava2-13/jre/lib/ext/comm.jar:
tinyos-1.x/tools/java/jars/plot.jar:tinyos-1.x/tools/java/jars/cup.jar:
tinyos-1.x/tools/java/jars/xercesImpl.jar:tinyos-1.x/tools/java/jars/xmlParserAPIs.jar:
tinyos-1.x/tools/java/jars/JLex.jar:tinyos-1.x/tools/java
If you installed TinyOS and TinyDB from the TinyOS 1.1 RPMS, your classpath should have been automatically configured to include these files (as well as a number of files, which should not be a problem.)
You may see warnings about ``deprecated classes'' when javac runs. These are OK, and you can ignore them. After running the java command, you should see the TinyDB control panel and query interface appear.
Once you have a working installation of these files, continue on to the next section to learn how to run queries with TinyDB.
The first step is to program a number of motes with the TinyDB software. Each of these motes must have a unique ID; recall that, in TinyOS, you can set the ID of a mote when running make install by appending .nodeid - for example, to program a TinyDB mote at ID 2, you would type:
To run TinyDB, you will need at least two motes: one to act as the basestation mote, and one or more to distribute and run queries over. You may want to place a sticker on your chosen basestation mote, since you will need to identify it visually. All motes, including the basestation, run the same TinyDBApp application, however, the basestation mote must be set to ID 0.
After programming your motes, connect the programming board to your computer via the serial port, and place the basestation mote in the programming board. Turn on all of the motes.
Figure 1 illustrates the basic setup of motes and PC.
Two windows should appear; one, the command window (Figure 3), allows you to send a variety of control commands to the motes. The other, the query window (Figure 2), allows you to build and send queries into the network. We will be focusing on the operation of the query window in the next section; the command window is fairly self-explanatory.
The query window contains a Display Topology button to show the network topology. This button actually generates a particular query that is executed by the motes, with results displayed in a special visualization. It is a good idea to display you network topology and make sure that all your motes are alive and communicating.
Once you see that your network of motes is operational, you can proceed to constructing queries.
Before describing TinyDB's query facilities, a few words on TinyDB's data model are in order. TinyDB implicitly queries one single, infinitely-long logical table called sensors. This table has one column for each attribute in the catalog, including sensor attributes, nodeIDs, and some additional ``introspective'' attributes (properties) that describe a mote's state. This table conceptually contains one row for each reading generated by any mote, and hence the table can be thought of streaming infinitely over time. A given mote may not be able to generate all the attributes, e.g., if it does not have the sensor that generates the attribute. In that case, the mote will always generate a NULL value for that attribute.
TinyDB's query language is based on SQL, and we will refer to it as TinySQL. As in SQL, queries in TinySQL consist of a set of attributes to select (e.g. light, temperature), a set of aggregation expressions for forming aggregate result columns, a set of selection predicates for filtering rows, and optionally a grouping expression for partitioning the data before aggregation. Aggregation is commonly used in the sensor environment.
Currently, TinySQL results are very similar to SQL, in that they are based on snapshots in time - that is, they are posed over rows generated by multiple sensors at one point in time. Temporal queries that combine readings over several time periods are not supported in the current release. Instead, TinySQL runs each query repeatedly, once per time-period or ``epoch''. The duration of an epoch can be specified as part of a TinySQL query; the longer the duration, the less frequent the results, and the less drain on the mote batteries.

The topmost widget in the window is the Epoch Duration widget, which specifies the interval at which the query is re-evaluated. We recommend that the epoch duration be set as large as possible to minimize power drain on the motes.
To specify the query to run each epoch, you first choose the
attributes and/or aggregate expressions to appear in the output.
Attributes are specified by choosing them in the Available
Attributes list, and pressing the ``![]() '' button so that they
appear in the Projected Attributes list. Optionally, attributes
may be placed in simple aggregate expressions by choosing an aggregate from the
pull-down menu in the middle of the screen (default: None). At
this stage, the Projected Attributes list must
contain either all aggregate expressions, or all attributes; a mixture
will result in an error message unless there is a GROUP BY
clause. We will return to this point shortly.
'' button so that they
appear in the Projected Attributes list. Optionally, attributes
may be placed in simple aggregate expressions by choosing an aggregate from the
pull-down menu in the middle of the screen (default: None). At
this stage, the Projected Attributes list must
contain either all aggregate expressions, or all attributes; a mixture
will result in an error message unless there is a GROUP BY
clause. We will return to this point shortly.
To select only some of the rows to be considered in the query, you can specify predicates to filter the data, via the New Predicate button at the bottom of the screen. All the predicates you select will be implicitly ``AND''ed together. ``OR'' is not yet supported.
If you used aggregate expressions in your Projected Attributes list, you can also specify a GROUP BY column by clicking on the GROUP BY checkbox and selecting from the pulldown menu. The pulldown menu to the right of the GROUP BY column is for right-shifting the (binary) value of the column before grouping; each shift divides the value of the GROUP BY column by 2. This has the effect of reducing the number of possible groups: the more times you divide by 2, the fewer possible groups there can be.
After adding a GROUP BY column, you can now add it (unaggregated!) to
the Projected Attributes by selecting it from the Available
Attributes list and pressing the ``![]() '' button. This is the only
way to mix aggregates and attributes in your query
output1.
'' button. This is the only
way to mix aggregates and attributes in your query
output1.
TinyDB includes a facility for simple triggers, or queries that execute some command when a result is produced. Currently, triggers can be executed only in response to some local sensor reading that satisfies the conditions specified in the WHERE clause of the query. Aggregate queries cannot have triggers associated with them. Whenever a query result satisfies the WHERE clause of a query, the trigger action is executed. This action is a named command stored in the schema of the mote (see Section 8.1.1 for more information.)
The current TinyDB interface includes simple trigger actions for blinking LEDs and sounding the sounder (the small speaker on the Mica sensor board.) A trigger action can be specified via the GUI by clicking the TRIGGER ACTION checkbox and selecting the appropriate action. Other actions can be specified via the textual interface (see the next section) and the schema API (described in Section 8.1.1.)
As an example of what triggers can be used for, consider an application where the user wants to sound an alarm whenever the temperature near a sensor goes above some threshold. This can be accomplished via the simple trigger query:
SELECT temp
FROM sensors
WHERE temp > thresh
TRIGGER ACTION SetSnd(512)
EPOCH DURATION 512
The SetSnd command sounds the sounder, and the value of 512 specfies a sound duration of 512 ms.
TinyDB provides an SQL-like query language, which is simplified in a number of ways, but which also provides some new sensor-specific syntax. TinySQL queries all have the form:
SELECT select-list
[FROM sensors]
WHERE where-clause
[GROUP BY gb-list
[HAVING having-list]]
[TRIGGER ACTION command-name[(param)]]
[EPOCH DURATION integer]
The SELECT, WHERE, GROUP BY and HAVING clauses are very similar to the functionality of SQL. Arithmetic expressions are supported in each of these clauses. As in standard SQL, the GROUP BY clause is optional, and if GROUP BY is included the HAVING clause may also be used optionally.
Limitations
Sensor-Specific Features
The TRIGGER ACTION clause specifies an (optional) trigger action that should be executed whenever a query result is produced. See Section 4.1.1 for more information about triggers. The command name must be a command registered with the COMMAND component (see Section 8.1.1.) An optional integer parameter may be passed to the command.
The time between epochs is specified in the query via the EPOCH DURATION clause. The units for this duration are specified in milliseconds. If no epoch duration is specified, a value of 1024 ms is used by default.
Event-based queries begin running when a low-level ``event'' occurs. Example events are interrupt lines being raised on the processor or sensor readings going above or below some threshold. There are two steps involved in authoring event-based queries: defining the operating system event and registering the query with TinyDB.
To define an event, you must write a component that registers the event and signals that it has fired whenever it occurs. Registering events is much like registering commands and is covered in the TinySchema documentation which should have accompanied this document.
Event-based queries must be input in the text panel of the TinyDB GUI. The syntax of these queries is as follows:
1.2.8
 1.21.0
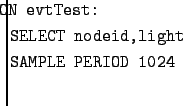
Where event is the name of the firing event. TinyDB ships with a single event, called evtTest, defined for demonstration purposes. This event can be fired using the ``Fire Test Event'' button on the Command Window (see Figure 3). For example, the query:
1.2.8
 1.21.0
Should cause the network to begin reporting sensor ids light values once per second when the ``Fire Test Event'' button is clicked.
TinyDB includes to ability to run queries that log into the Flash memory of the motes. To enable this feature, you need to turn on the kMATCHBOX option in the CompileDefines.h header file - see Section 5.2 below for more information.
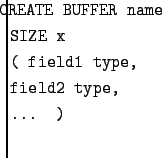
Queries over flash are accessible only through the text interface of the TinyDB GUI. TinyDB includes commands for creating tables that reside in flash, for running queries that insert into these tables, for running queries the retrieve from these tables, and for deleting these tables. The syntax for creating a table is much like the syntax for creating a table in traditional SQL:
1.2.8
 1.21.0
This creates a table named name, with space for x rows, where each row has the fields listed at the end of the query. Field and table names may be up to 8 characters long, and field types must be one of uint8, uint16, uint16, int8, int16 or int32, where the u indicates unsigned fields and the number at the end of the type indicates the number of bits in the field.
To add data to a specific table, run a query like:
1.2.8
 1.21.0
The number and types of the fields appear in this query must match the number and types of fields in the CREATE BUFFER statement above. The fastest rate available for logging queries is current 1 sample per 64 ms (values less than 64 will not work.) Note that only one query can log to a buffer at a time, and that new logging queries will overwrite data that was previously logged to a table.
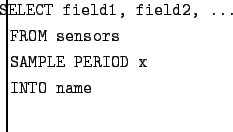
Finally, to select from a table, you run a query like:
1.2.8
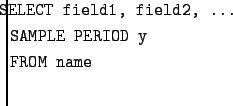 1.21.0
Where the field names are the same as field names specified in the CREATE BUFFER statement. This will fetch the logged results from the named buffer, starting at the beginning of the table and scanning forward.
Currently, in TinyDB, you may not run a query that selects from a
Flash table at the same time that a query which writes into the same
table is running. You must stop the logging query first, using the
``Stop Query'' button on the query window, or using the Stop Query
command line tool (see Section ![]() ).
).
Finally, you can delete all tables from Flash and reset the internal state associated with them by running the query:
1.2.8
 1.21.0
Future versions of TinyDB will include improved ability to delete individual tables and will support higher data rates.
When running queries longer than 4 seconds (by default), TinyDB enables power-management and time-synchronization. This means that each sensor is ``on'' for exactly the same four seconds of every sample period. Results from every sensor for a particular query should arrive at the basestation within four seconds of each other.
This time-synchronization and power management enables long running
deployments of sensors. To compute the expected lifetime in hours of
your deployment, use the following calculation, assuming that the
sensor draws 100 ![]() A of current when sleeping and 12 mA of
current in active mode, and you are using a pair of AA batteries that
provide 2400 mAh of capacity, and the sample period you have selected
is
A of current when sleeping and 12 mA of
current in active mode, and you are using a pair of AA batteries that
provide 2400 mAh of capacity, and the sample period you have selected
is ![]() seconds:
seconds:
![]()
For example, using a sample period of 30 seconds, this results in a lifetime of about 60 days. A sample period of 120 seconds extends this lifetime to 200 days.
There are a few caveats with power management to bear in mind:
TinyDB uses a configuration file to configure some of its settings; this file is called ``tinydb.conf'' in the tinyos-1.x/tools/java/tinyos/tinydb directory. This file consists of colon (``:'') delimited pairs of settings and values. Blank lines and comments beginning with ``%'' are also allowed. Table 1 summarizes the major configuration file options. The configuration file is read once when the TinyDB application starts.
Settings in the configuration file are available to TinyDB java components via static methods in the Config.java class. Config.init(...) is called when TinyDBMain is instantiated. Components can call Config.getParam(...) to retrieve the value of a setting; if the setting has no value, null is returned.
|
TinyDB provides a very simple text mode for running queries (when using the -run command line option.) Query results are printed out to the console ; motes are reset each time a new query is posed (no interface to stop a currently running query or run multiple queries is currently available via this interface.)
For example, posing the command (in a single mote network):
java net.tinyos.tinydb.TinyDBMain -run ``select nodeid,light epoch duration 1024''
produces output resembling:
|    Epoch   |  nodeid  |    light  |
-------------------------------------
      3      |    12    |    860    |
      4      |    12    |    860    |
      5      |    12    |    861    |
      8      |    12    |    860    |
      9      |    12    |    879    |
      11     |    12    |    860    |
      12     |    12    |    860    |
...
The LEDS on TinyDB motes are used to indicate the current status of the device; each LED is used to communicate one of several pieces of information, depending on the current status of the mote. A simple selection query should cause the mote to blink its yellow LED once per epoch, and its red LED once per data value forwarded up the tree. The following table summarizes other LED actions by mote status:
| Mote Status | LED Response | Notes |
| Sent Message | Red Toggle | |
| Received Aggregate From Child | Green Toggle | |
| End of Epoch | Yellow Toggle | Once per query |
| Aborted Query | All LEDS On | |
| Reset Mote | All LEDS Flash |
TinyDB includes several debugging and status tools that can be enabled to help understand the status of running devices.
The most important new tool that is available is the TinyOS simulator (TOSSIM) - to learn how use TinyDB in TOSSIM, see Section 9 of this document.
Three other tools for debugging running motes are available. The first is the status panel and status command. The status panel now appears when the TinyDB GUI is started, as shown in Figure 4. It provides a list of queries currently running on the basestation mote and can be used to tell if a particular query was successfully injected into the network.
The second tool is the UARTDebuggerM.nc, which is a component for driving an
external serial display. To enable support for this component, you must enable
the kUART_DEBUGGER option in CompileDefines - see Section ![]() for more information. A serial display can be used to print status messages as
the mote is running. The tinyos-1.x/tos/lib/Util/UartDebuggerM.nc file
includes information about purchasing such a display and interfacing it to a
mote.
for more information. A serial display can be used to print status messages as
the mote is running. The tinyos-1.x/tos/lib/Util/UartDebuggerM.nc file
includes information about purchasing such a display and interfacing it to a
mote.
Finally, if you have access to an AVR JTAG debugger, you can debug your mote using gdb. See the documentation with the TinyOS release in tinyos-1.x/doc/nesc/debugging.html.
Although the basic version of TinyDB will run without modification on the basic Mote platforms, there are some advanced options and configuration files for the TinyDBApp nesC application that advanced users may wish to configure. Changes made in this section will require you to recompile the mode-side software and reinstall it on your motes.
This section describes the steps involving in configuring TinyDB to use a different sensor board or adding support for a new sensor board to TinyDB. The components used to support the different sensorboard hardware are stored in individual directories in the tinyos-1.x/tos/sensorboards directory. Each of these directories contains a sensorboard.h file that defines the ADC ports used by the sensorboard in question; we do not document the structure or contents of these files and components here - refer to the TinyOS tutorials for more information about the ADC.
TinyDB must be configured at compile time to use one of these sensorboard directories. Configuration is done through the tinyos-1.x/apps/TinyDBApp/Makefile. To change to a different sensorboard, change the line that reads SENSORBOARD=micawb to refer to a different subdirectory of the sensorboards directory.
You must also add attributes to TinyDB for each of the sensors in the sensorboard of interest. These attributes are stored in tinyos-1.x/tos/lib/Attributes. For more information about authoring attributes in TinyDB, see the TinySchema documentation which should be included with this document and is available as a part of the TinyOS distribution in the tinyos-1.x/doc/tinyschema.pdf file.
Once you have created attributes for your new sensors, you can add them to TinyDB via the following steps:
MyLightSensor.StdControl = StdControl
to the implementation block. Note that MyLightSensor.nc needs to register itself using the AttrRegister.registerAttr() command, as described in the TinySchema documentation.
<attribute>
  <name> </name>
  <type> </type>
  <minval> </minval>
  <maxval> </maxval>
  <isConstant> </isConstant>
  <joulesPerSample> </joulesPerSample>
</attribute>
The last four elements are optional. Name is the name for the attribute that should be used in the query and will be shown in the GUI. Type is the data type of the attribute; it should be one of int8,uint8,int16,uint16,int32,uint32, or string. minval and maxval are used in the visualization and for query optimization; the define the minimum and maximum values for the attribute (and are only needed for integer types.) isConstant is a boolean specifying whether the attribute is a constant value; this will eventually be used in query optimization but is currently unused. joulesPerSample is an approximation of the energy required to acquire a sample from this attribute; this is also used in query optimization.
The latest version of TinyDB has a number of compile-time options that need to be properly configured to enable certain features. These options are configured through the tinyos-1.x/tos/lib/TinyDB/CompileDefines.h file, which contains a number of options that set up with #define or #undef statements.
RAM constraints prevent TinyDB from being able to support all options simultaneously. CompileDefines.h includes rough measurements of the RAM requirements of each feature; the total RAM usage of TinyDB (displayed when the make mote-type command is issued) should not exceed 3100 bytes.
Options include:
| Option | Description |
| kUSE_MAGNETOMETER | Compile the magnetometer attribute into TinyDB. Only needed if a sensor board that includes a magnetometer is included. Disabled by default. |
| kQUERY_SHARING | Enable the ``query sharing'' feature that allows motes to exchange queries with their neighbors (e.g without explicit retransmission via the ``send query'' command.) Enabled by default. |
| kFANCY_AGGS | Enable a number of fancy aggregates similar to those discussed in the SIGMOD 2003 paper on Acquisitional Query Processing (ACQP). Disabled by default and not otherwise documented. |
| kEEPROM_ATTR | Enable the EEPROM logging attribute that allows a signal to be captured to the EEPROM. Disabled by default and not otherwise documented. |
| kCONTENT_ATTR | Enable the content attribute which provides a 16 bit integer indicating the amount of radio contention currently on the radio. Disabled by default. |
| kRAW_MIC_ATTRS | Enable the raw microphone attribute tones that indicates whether or not the tone detector circuit on the mote is currently detecting a 400Hz tone. Disabled by default. |
| kLIFE_CMD | Enable the lifetime command causes the mote to adjust the sample rate of running queries to the specified lifetime. Disabled by default and not otherwise documented. |
| kUART_DEBUGGER | Enable support for a debugging display connected over the UART. See
section |
| kSUPPORTS_EVENTS | Enable support for events (see Section |
| kSTATUS | Enable support for the status command, that indicates the queries that are currently running on the mote. Enabled by default. |
| kMATCHBOX | Enable support for the Matchbox file system and logging queries. See Section 4.6 for more information. Disabled by default. |
| NETWORK_MODULE | The name of the network module to use. By default, set to NetworkMultiHop.nc See 8.4 for more information. |
The Tiny Application Sensor Kit (TASK) provides a number of configuration tools and user interfaces designed to make it easier to interact with a network of sensors running TinyDB. Key features include:
For more information about TASK, see the TASK manual in tinyos-1.x/doc/task.pdf or at http://berkeley.intel-research.net/task/
We begin with an overview of the API, and go on to an overview of the GUI program, which exercises the API. The discussion here is fairly high level, and is intended to accompany some investigation of the code itself.
This object is the main interface to a network of motes. It is responsible for injecting new queries into the network (sendQuery()), for cancelling queries ( abortQuery()), and for providing results from the network to multiple query ``listeners''. Only one instance of the TinyDBNetwork object needs to be allocated for a network; that instance can manage multiple ongoing queries, and multiple listeners. Each query's output can be sent to multiple listeners, and each listener can listen either to a single query, or to all queries.
Internally, the object maintains a list of live queries, and three sets of listeners:
The TinyDBNetwork object handles all incoming AMAM messages from the serial port, and dispatches copies of them to the listeners and qidListeners accordingly. It also processes the messages to generate result tuples (via QueryResult.MergeQueryResult()) and sends them to processedListeners accordingly. As part of processing results, it maintains info on epochs to make sure that the epoch semantics of the results are correct.
Internally, the TinyDBNetwork object also has a background thread that participates in the sensor network's routing algorithms. It periodically sends information down the routing tree, so that children know to choose the root as a parent, and so that children can decide how to share the timeslots in an epoch.
Queries consist of:
In addition to allowing a query to be built, this class includes handy methods to generate specific radio messages for the query, which TinyDBNetwork can use to distribute the query over the network, or to abort the query.
It also includes a support routine for printing the query result schema.
This provides the code for the aggregation operators SUM, MIN, MAX, and AVG. It includes representation issues (internal network codes for the various ops, and code for pretty-printing), and also the logic for performing final merges for each aggregate as part of QueryResult:MergeQueryResult().
The TinyDB application consists of only a few objects:
The major portion of the GUI contains a tabbed pane that provides two different interfaces for inputting queries:
MagnetFrame runs a simple query of the form
SELECT nodeid, mag_x FROM sensors WHERE mag_x ![]() EPOCH DURATION 256
EPOCH DURATION 256
We assume that the reader of this section is familiar with code development for the Berkeley motes in the TinyOS framework. For documentation and tutorials on TinyOS, please see the TinyOS web page.
In this section we discuss the TinyOS components that make up TinyDB. The component diagram for TinyDB - including the TinyOS components it references - is shown in Figure 5.
A schema describes the capabilities of the motes in the system as a single virtual, database ``table''. This table can contain any number of typed attributes. It can also contain handles to a set of commands that can be run within the query executor, much like ``methods'' in the Object-Relational extensions to SQL.
During query processing, sensor readings from each mote are placed into tuples, which may be passed between motes for multi-hop routing and/or aggregation, or which may be passed out the serial port at the top of the network to the front-end code.
The Attr.nc component implements the AttrRegister.nc and AttrUse.nc interfaces for getting and setting the values of attributes.
Schema commands can be invoked locally via (CommandUse.invoke), and to send a message to invoke schema commands on other nodes (CommandUse.invokeMsg), both of which are implemented by the Command.nc module.
See the TinySchema document for complete details on how to manage attributes and commands for TinyDB.
The TupleRouter component contains three main execution paths:
Handling New Queries
New queries arrive in TupleRouter via the Network.queryMsg event. Each query
is assumed to be identified by a globally unique ID, which must be
generated by the Java front-end APIs. Query
messages contain a part of a query: either a single field (attribute) to
retrieve, a single selection predicate to apply, or a single
aggregation function to apply. All the QueryMessages describing a
single query must arrive before the router will begin routing tuples
for that query.
Once all the QueryMessages have arrived, the router calls parseQuery() to generate a compact representation of the query in which field names have been replaced with field IDs that can be used as offsets into the sensors local catalog (Schema).
Given a parsedQuery, the tuple router allocates space at the end of the query to hold a single, ``in-flight'' tuple for that query - this tuple will be filled in with the appropriate data fields as the query executes.
TupleRouter then calls setSampleRate() to start (or restart) the mote's 32khz clock to fire at the appropriate data-delivery rate for all of the queries currently in the system. If there is only one query, it will fire once per ``epoch'' - if there are multiple queries, it will fire at the greatest common divisor of the delivery intervals of all the queries.
Tuple Delivery
Whenever a clock event occurs in TupleRouter (Timer.fired), the
router must perform four actions:
Neighbor Result Arrival
When a result arrives from a neighbor, the TupleRouter receives a Network.dataMsg event.
This result needs to be integrated into the aggregate values being computed
locally. If the result corresponds to an aggregate query, that result
is forwarded into the AggOperator component, otherwise it is
simply forwarded up the routing tree towards the root.
The optional GROUP BY feature partitions the data by the value of a (set of) attribute(s). Aggregate functions are computed for each partition, over any attributes not in the GROUP BY clause. In the absence of a GROUP BY expression, the aggregate is computed over all tuples. As described in Section 4, aggregate results are updated once per ``epoch''.
The code in this component needs to (a) take readings from the current node (Operator.processTuple), (b) merge those readings with sub-aggregates from the subtree (Operator.processPartialResult), and (c) return this node's sub-aggregate results up the tree (Operator.nextResult). It also manages allocating aggregation state for each group using the TinyAlloc component (Section 8.3), and provides a utility to reset the running aggregation state (Operator.resetExprState).
TinyAlloc is a simple, handle-based compacting memory manager. It allocates bytes from a fixed size frame and returns handles (pointers to pointers) into that frame. Because it uses handles, TinyAlloc can move memory around in the frame without changing all the external references. Moving memory is a good thing because it allows frame compacting and tends to reduce wasted space. Handles can be accessed via a double dereference (**), and a single dereference can be used wherever a pointer is needed, but if a single dereference is to be stored, the handle must be locked first (via MemAlloc.lock(h)), as otherwise TinyAlloc may move the handle and make the reference invalid.

Like all good TinyOS programs, TinyAlloc is split-phase with respect to allocation and compaction. Allocation/reallocation completion is signalled via a MemAlloc.allocComplete() signal and compaction via a MemAlloc.compactComplete() signal. All other operations complete and return in a single phase. Note that compaction may be triggered automatically from allocation; in this case a compactComplete event is not generated.
Handles are laid out in the frame as follows:
   [LOCKED][SIZE][user data]

Where:
    LOCKED     : a single bit indicating if the handle is locked
    SIZE       : 7 bits representing the size of the handle
    user data  : user-requested number of bytes (**h) points to
                 [user data], not [LOCKED].
Calling MemAlloc.size(h) returns the size of [user
data] (note that the internal function size() returns the size of the
entire handle, including the header byte.)
TinyDB includes a modular interface for interacting with a number of different multihop routing layers. This interface, called Network.nc is available in tinyos-1.x/tos/lib/TinyDB/, requires routing layers to provide the following methods:
TinyDB includes support for the TinyOS simulator, TOSSIM (also know as ``nido''). Running under TOSSIM requires recompilation of the java source code as well as the mote code, and requires passing a special flag to the TinyDB java application when it is started. See the file tinyos-1.x/doc/nido.pdf for more information about TOSSIM. The basic steps to set up TinyDB for TOSSIM are as follows:
TinyDB includes a facility to make it relatively easy for programmers to author new aggregate operators. See the accompanying manual, ``Extending TinyDB: Creating Custom Aggregates'' included with the TinyOS-1.1 release and available on the TinyDB web page for more information.
Though TinyDB still supports these logging features, it is highly recommended that users interested in long-term deployments based on TinyDB use the TASK client (documentation for TASK is available from the TinyDB website.) TASK supports much more thorough logging and configuration management than the features described below.
TinyDB includes a simple facility to log results of queries to a
PostgreSQL database. Postgres is an open-source,
widely used DBMS available on a wide-variety of platforms ( See
www.us.postgresql.org
for more
information.) To enable logging to a Postgres database, set up
Postgres according to the directions in the next section, and then
enable the ``Log to Database'' option when inputting a query via the
query GUI (see Figure 2.) Note that it is not neccessary
to configure Postgres unless you wish to use the logging
facilities. The results of the query will be written to a table
named ``q![]() '', where
'', where ![]() is a unique sequence number assigned to the
query. You can determine the current sequence number for a query by
calling the getTableName() method on the DBLogger object
used to initiate query logging. The resulting table will contain a
timestamped entry for each result returned by the query. For example,
if your query is select light,temp from sensors, the resulting
Postgres table will have the schema:
is a unique sequence number assigned to the
query. You can determine the current sequence number for a query by
calling the getTableName() method on the DBLogger object
used to initiate query logging. The resulting table will contain a
timestamped entry for each result returned by the query. For example,
if your query is select light,temp from sensors, the resulting
Postgres table will have the schema:
| result_time:timestamp | epoch:integer | light:integer | temp:integer |
In this way, TinyDB query results can be accessed offline and joined with results from other static, offline data sources.
Download Postgres for your distribution from
ftp://ftp3.us.postgresql.org/pub/postgresql/binary/v7.3.4/RPMS/.
You'll need at least the following packages:
postgresql-libs
postgresql
postgresql-server
postgresql-jdbc
Note that newer versions of Redhat linux come with the postgresql and postgres-libs packages preinstalled, but with versions older than 7.3.4. You will either need to remove these packages before installing the 7.3.4 packages, or just install the postgresql-server and postgres-jdbc packages from the version of Postgres that came with your Redhat distribution.
Install the packages in the above order, and then start the Postgres service. Under Redhat, the command to do this is: /etc/rc.d/init.d/postgresql start
You'll need to modify your Postgres installation to allow connections over TCP/IP sockets. With the Redhat RPMS, Postgres is configured to store its data files in /var/lib/pgsql/data; you'll need to substitute appropriately in the commands below if your Postgres files are in a different location:
On some Redhat installations, you may also need to enable connections from localhost (e.g. IP address 127.0.0.1). To do this:
#tcpip_socket = false
with
tcpip_socket = true
Next, you'll need to make sure the Postgres JDBC driver (included in the TinyOS distribution) is in your classpath. The jar is located at tinyos-1.x/tools/java/jars/pgjdbc2.jar; under bash, you would type:
export CLASSPATH=$CLASSPATH:tinyos-1.x/tools/java/jars/pgjdbc2.jar
The TinyDB config file (see 4.8) above specifies a database and user name to use when accessing Postgres. Both need to be created before TinyDB will work; to do this under Redhat, type:
su
postgres
createdb tinydb
createuser tele
TinyDB logs all of the queries that are logged to a table ``queries'', which contains the name of the result table for the query, time the query was posed, and the text of the query. You must create this table before TinyDB; to do so under Redhat, do the following:
You need to choose a directory where Postgres will store its data files. We'll use /pgdata, though you may choose any directory.
Before running Postgres, you must install the cygipc package (note that this may change for future releases of Cygwin.) We have verified that cygipc 1.14 works.
Cygipc is now part of the cygwin distribution available from http://www.cygwin.com.
Initialize Postgres using the following commands:
This may take several seconds to complete. You should see several lines of output about creating directories and fixing permissions.
You may wish to modify your Windows environment to set these variables and start the ipc-daemon automatically. You can add the ``export PGDATA=/pgdata'' command to your .bashrc file. To cause the ipc-daemon to be started whenever windows boots, run the command ``ipc-daemon -install-as-service''.
To use Postgres, you need to start the postmaster daemon - type pg_ctl start to start it. Note that you must do this every time you wish to use Postgres features after having restarted your machine.
You'll need to modify your Postgres installation to allow connections over TCP/IP sockets:
Next, you'll need to make sure the Postgres JDBC driver (included in the TinyOS distribution) is in your classpath. The jar is located at tinyos-1.x/tools/java/jars/pgjdbc2.jar; under bash, you would type:
export CLASSPATH=$CLASSPATH:tinyos-1.x/tools/java/jars/pgjdbc2.jar
The TinyDB config file (see 4.8) above specifies a database and user name to use when accessing Postgres. Both need to be created before TinyDB will work; to do this under, type:
createdb tinydb
createuser tele
TinyDB logs all of the queries that are logged to a table ``queries'', which contains the name of the result table for the query, time the query was posed, and the text of the query. You must create this table before TinyDB; to do so, do the following:
TinyDB is configured to connect directly to the network. You can make it use an existing serial forwarder by changing the value of the comm-string in the tinydb.conf file (see Section 4.8) to sf@localhost$9000. You'll need to change the port number and host name appropriately.
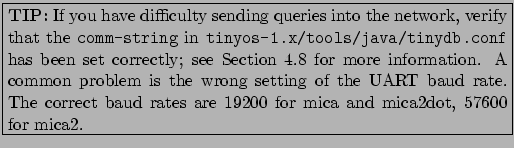
First (as always), check that all your cables are properly connected. Power cycle your base station. If you still can't send queries, verify that the comm-string field in the tinydb.conf file (see Section 4.8) is set correctly according to tinyos-1.x/doc/serialcomm/index.html. A common problem is the wrong setting of the UART baud rate. The correct baud rates are 19200 for mica and mica2dot, 57600 for mica2.
http://sourceforge.net/tracker/?atid=494883&group_id=28656&func=browse
for a list of bugs that have been submitted. If you see a similar bug there, we may have posted a workaround. If your bug isn't there, or the workaround is not satisfactory, feel free to enter a new bug or send us a bug report and we'll enter it for you!
This document was written by Joe Hellerstein, Sam Madden, and Wei Hong. This is Version 0.4, last updated September 17, 2003.
Changes in version .4: Updated documentation for the TinyOS 1.1 release.
Changes in version .31: Updated documentation on using Postgres with Windows/Cygwin.
This document was generated using the LaTeX2HTML translator Version 2002-1 (1.68)
Copyright © 1993, 1994, 1995, 1996,
Nikos Drakos,
Computer Based Learning Unit, University of Leeds.
Copyright © 1997, 1998, 1999,
Ross Moore,
Mathematics Department, Macquarie University, Sydney.
The command line arguments were:
latex2html -split 1 -show_section_numbers -no_navigation tinydb.tex
The translation was initiated by Sam Madden on 2003-09-29